

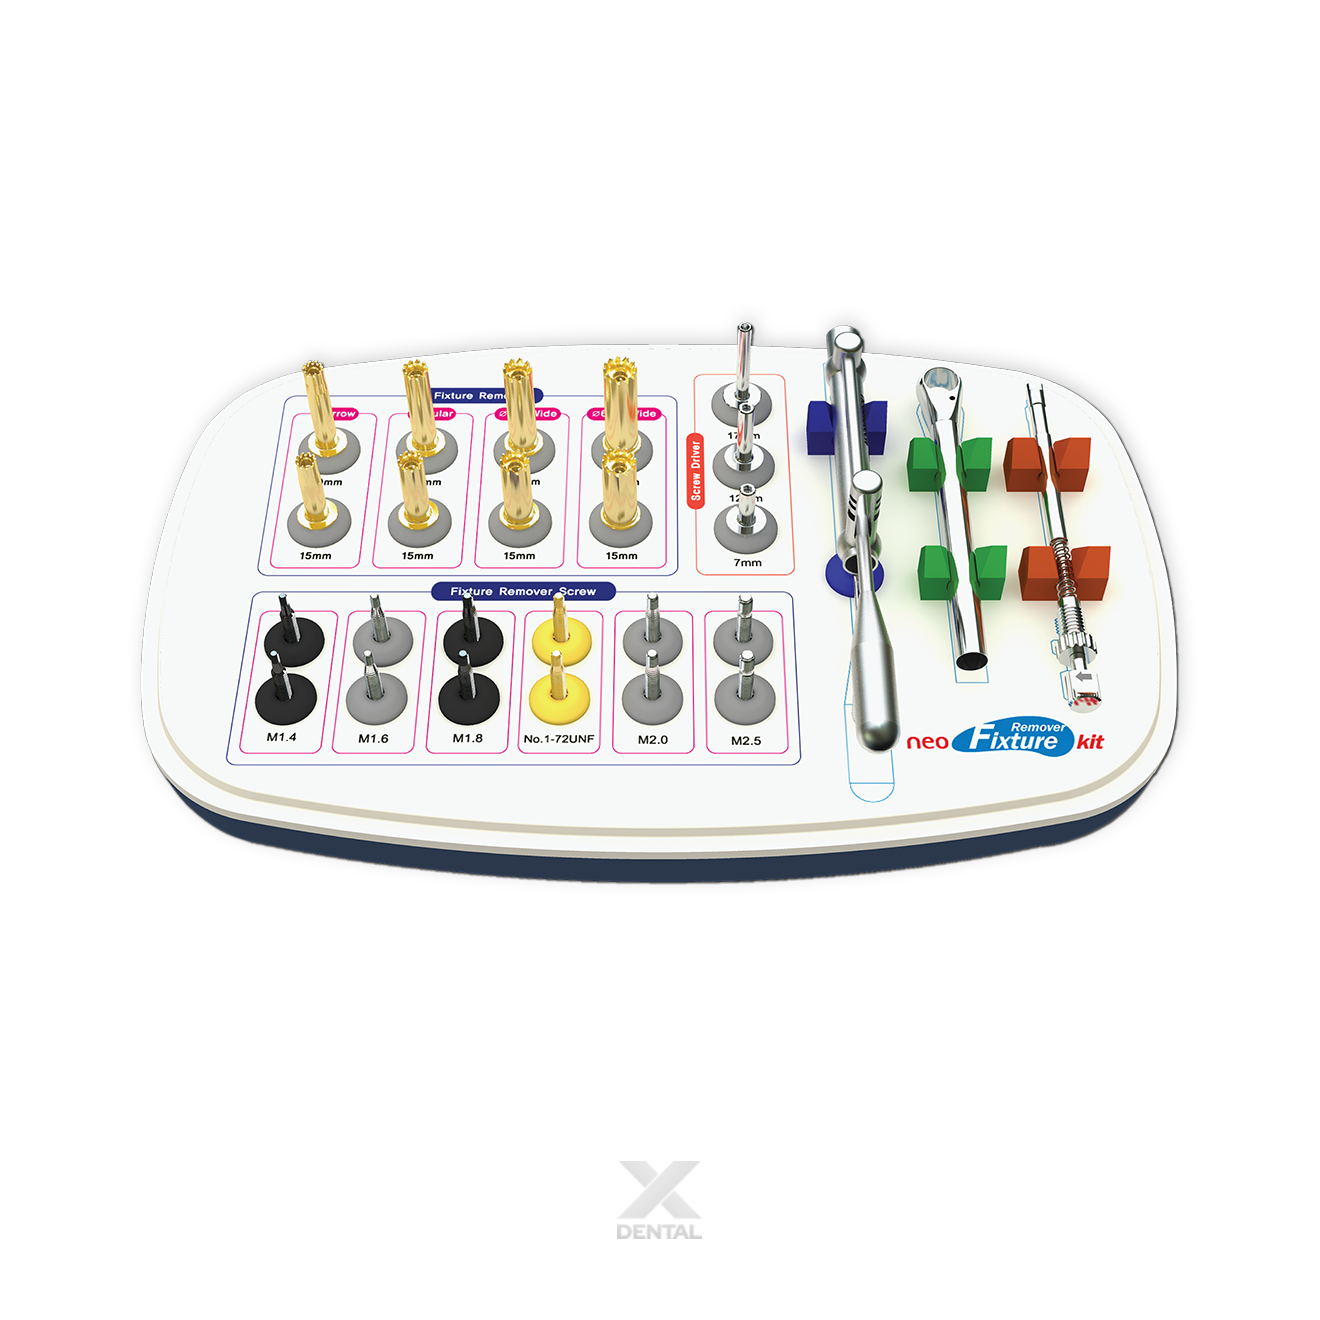

FR Kit
Fixture Removal Kit
A purpose-built system for removing failed implants — osseointegrated or fractured — with minimal bone damage. No trephine drill required. The FR Kit's clamping mechanism applies controlled counter-torque directly to the implant body, preserving surrounding bone for immediate re-implantation and GBR.
What clinicians are saying
Real-world feedback from implantologists using the Neobiotech FR Kit in their practices.
"The FR Kit changed how I think about failed implants. I used to dread the conversation — trephine drilling, bone loss, months of healing before anything else could happen. Now I can remove the fixture, assess the site, and in most cases place a new implant the same day. The clamping mechanism is intuitive once you've done it a couple of times, and the bone condition post-removal has been consistently better than I expected."
"What I appreciate most is the torque control. You're working with a defined range for each screw size, the counter-torque ratchet gives you tactile feedback, and you're never guessing whether you've applied enough force. I had a fractured implant case — no exposed head — and the FR Kit handled it cleanly. Site was immediately graftable."
When to use the FR Kit
Designed for implant removal in a wide range of clinical scenarios — from early failure through to fully osseointegrated or fractured fixtures.
The original implant removal solution
See the FR Kit in action — how the counter-torque clamping mechanism removes failed fixtures while preserving the surrounding bone.
Four-step removal protocol
A standardised sequence that applies controlled clamping force to reverse-torque the implant body — without rotary cutting instruments.

Failed implant

Right turn Close — FRS tightened

Left turn Close — clamping engaged

Implant removal
FR Kit in clinical use
A case demonstrating the FR Kit technique for removing an osseointegrated fixture with preserved bone thread condition.
Failed Implant Removal — Preserved Bone Condition
3mm bone loss at #35 — fixture removed using FR Kit, site found immediately graftable

3mm bone loss observed at #35

FRS connected to implant at 70 Ncm (less than 80 Ncm recommended)

FRS inserted to reference line — prevents screw fracture

Fixture Remover tightened counterclockwise onto FRS

Counter-torque applied up to 300 Ncm with copious irrigation

Implant removed without damage to surrounding bone

Favourable bone thread condition preserved
What's in the kit
The FR Kit includes all instruments required for controlled implant removal — Fixture Removers, Fixture Remover Screws, Hex Drivers, and Torque Wrench — supplied in a dedicated tray.

Fixture Remover Screw (FRS)
Connects to the implant internal connection. "M" denotes metric; number indicates external diameter.
| Screw Size | Recommended Torque (Ncm) |
|---|---|
| FRS14 — M1.4 | 60 |
| FRS16 — M1.6 | 80 |
| FRS18 / FRS172 — M1.8 | 80 |
| FRS20 — M2.0 | 80 |
| FRS25 — M2.5 | 80 |
| 1-72UNF | 80 |
FR Screw Hex Driver
Used to connect and tighten the Fixture Remover Screw into the implant. Available in three lengths.
| Length |
|---|
| 7mm |
| 12mm |
| 17mm |
Fixture Remover (FR)
Threaded onto the FRS counterclockwise to apply clamping force and counter-torque for implant removal.
| Type | Length |
|---|---|
| Narrow | 15mm · 20mm |
| Regular | 15mm · 20mm |
| Wide (Ø5) | 15mm · 20mm |
| Wide (Ø6–8) | 15mm · 20mm |
Fixture Removing Torque — Compatibility & Max Torque
Maximum counter-torque achievable by Fixture Remover and Fixture Remover Screw combination, by implant platform size.
| Fixture Size | Remover | Screw | Max Torque (Ncm) |
|---|---|---|---|
| Narrow | FR315 / FR320 | FRS14 | 200 |
| FRS16 | 250 | ||
| FRS18 / FRS172 | 300 | ||
| FRS20 | 350 | ||
| Regular | FR315 / FR320 | FRS18 / FRS172 | 300 |
| FR315 / FR320 | FRS20 | 350 | |
| FR415 / FR420 | FRS18 / FRS172 | 350 | |
| FR415 / FR420 | FRS20 | 350 | |
| Wide (Ø5) | FR415 / FR420 | FRS20 | 350 |
| FR415 / FR420 | FRS25 | 400 | |
| FR515 / FR520 | FRS20 | 350 | |
| FR515 / FR520 | FRS25 | 400 | |
| Wide (Ø6–8) | FR515 / FR520 | FRS20 | 350 |
| FR515 / FR520 | FRS25 | 400 | |
| FR615 / FR620 | FRS20 | 350 | |
| FR615 / FR620 | FRS25 | 400 |
Torque Wrench (Torque Control Device)
Two-piece torque wrench system for applying precise counter-torque during fixture removal.
| Component | Function |
|---|---|
| Torque Wrench — Body | Ratchet body; cross-bar grip for applying rotational force |
| Torque Wrench — Slider | Ratchet head / slider attachment for controlled counter-torque delivery |
Technical specifications
| Device type | Implant fixture removal instrument kit |
| Indication | Removal of failed, fractured, or ill-positioned dental implants with screw-hole access |
| Compatibility | Any implant system with screw-hole access — M1.4, M1.6, M1.8, M2.0, M2.5, 1-72UNF connections |
| Fixture Remover types | Narrow · Regular · Wide (Ø5) · Wide (Ø6–8) — each in 15mm and 20mm lengths |
| Fixture Remover Screw sizes | FRS14 · FRS16 · FRS18 · FRS172 · FRS20 · FRS25 |
| FRS recommended torque | 60 Ncm (M1.4) · 80 Ncm (all other sizes) |
| Maximum removal torque | Up to 400 Ncm (Wide platform with FRS25) |
| Hex Driver lengths | 7mm · 12mm · 17mm |
| Trephine drill required | No |
| Manufacturer | Neobiotech Co., Ltd — Seoul, Korea |
| Origin | Made in Korea |
Getting the most from your FR Kit
Practical guidance for safe, predictable implant removal and site management.