

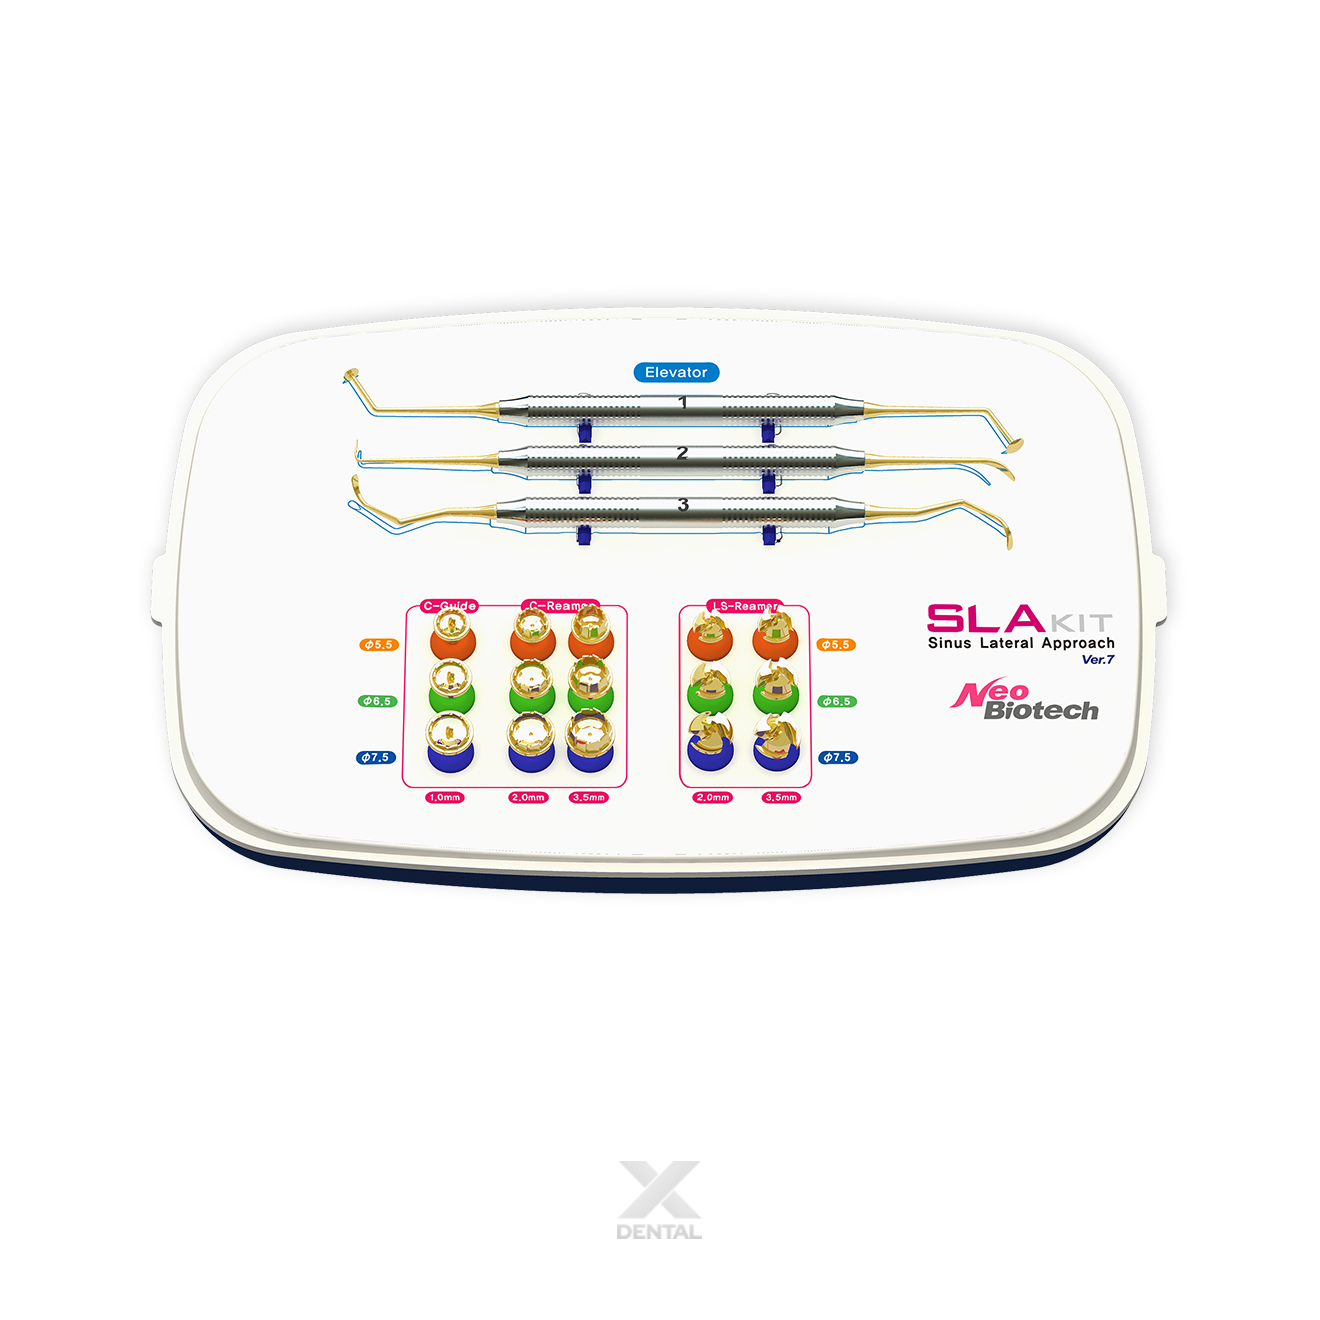

SLA Kit
Sinus Lateral Approach Kit
A complete surgical kit for lateral window sinus elevation — perforating the lateral sinus wall and lifting the Schneiderian membrane without membrane tearing. The SLA Kit provides the definitive solution for cases where crestal approach is not viable: very thin residual bone height, previous crestal membrane rupture, or multiple implant placement. Minimal flap, minimal window, maximum control.
What clinicians are saying
Real-world feedback from implantologists using the SLA Kit for lateral window sinus elevation in their surgical practice.
"The SLA Kit changed how I think about minimal-bone posterior maxilla cases. I used to default to a full Caldwell-Luc style window on every thin bone case — now I'm opening a much smaller lateral hole near the crest and achieving the same membrane elevation with less soft tissue management. The tapered trunk of the LS-Reamer stopping at exactly the right depth without a drill stop is genuinely useful. It frees up a hand and keeps the drilling feel consistent."
"The C-Reamer's ability to recover a circular bone core disk from the lateral wall is the feature I didn't expect to value as much as I do. Using the patient's own bone disk to cover the lateral window before suturing is a cleaner closure than a collagen membrane patch alone, and patients understand the logic intuitively when I explain it chairside. The three elevator sequence — mesial/distal first, then inferior, then anterior/posterior — makes systematic membrane detachment straightforward to teach."
When to use the SLA Kit
The SLA Kit is the definitive choice when crestal sinus elevation is not an appropriate option — providing lateral window access with minimal flap and minimal invasiveness.
Minimally Invasive · Speed · Complete
Three design principles that define the SLA Kit — each directly addressing a clinical advantage over conventional lateral window sinus lift technique.

Minimally Invasive
Minimal flap, smaller window
— near the crest
The SLA Kit instruments are designed to open the lateral sinus wall as close to the crest as possible, with a minimal flap — smaller than conventional lateral window technique. The LS-Reamer's sharp center point acts as its own guide and does not slip on the lateral wall, enabling a precise, upright drilling approach without needing a large surgical access area.

Speed
Depth control to 3.5mm
— no drill stop required
The LS-Reamer operates at 2,000 rpm on a standard surgical motor handpiece. Its tapered trunk geometry is designed to automatically control drilling depth up to 3.5mm without the need for a separate drill stop — both sides of the blade stay in contact with the lateral wall bone during drilling. A bone disk forms between the reamer and sinus membrane as the reamer fills with bone chips, providing a protective layer against membrane tearing.

Complete
Every tool for lateral window sinus lift
— in one kit
The SLA Kit includes every instrument required to perform a complete lateral window sinus lift: LS-Reamer for standard lateral hole formation, C-Reamer for bone core disk recovery, C-Guide for C-Reamer positioning, and three purpose-designed sinus membrane elevators (#1 mesial-distal · #2 inferior and medial · #3 anterior-posterior) used in sequence for systematic membrane detachment and elevation.
Step-by-step procedure sequence
Six procedural steps from flap formation through to bone grafting and closure — each instrument in the SLA Kit performs a defined role in the lateral window elevation sequence.

Flap
Open the soft tissue. A minimal flap is sufficient — a semilunar incision
is adequate for flapless cases. Position the lateral hole as anterior and
inferior as possible.

LS-Reamer
Make the lateral hole. Keep upright with steady drilling; both sides of blade
contact bone. Speed: 2,000 rpm with copious irrigation. C-Reamer may be used
to save circular bone core disk for window cover.

Bone Disk
The LS-Reamer leaves a thin residual bone shield between the lateral wall and
the sinus membrane — protecting the membrane during the drilling process.

Detach Sinus Membrane
Elevator #1 (SLE05) initiates membrane detachment in the mesial-distal area.
Use gently to separate membrane from the inner bone surface around the window.

Elevate Sinus Membrane
Elevator #2 (SLE02) detaches membrane in the inferior area. Elevator #3 (SLE03)
detaches remaining membrane in anterior and posterior deep areas. Use elevators
in sequence (#1 → #2 → #3).

Bone Graft
Place bone graft material into the elevated sinus space. Cover the lateral
hole with a collagen membrane (or the recovered bone core disk if C-Reamer
was used). Suture the soft tissue.
Use copious irrigation during all drilling steps. When lateral wall thickness exceeds 3.5mm, use C-Reamer (Ø7.5) first to remove a 2–3mm bone core disk, then complete perforation with LS-Reamer (Ø5.5).
Complete instrument set
All instruments required for the full lateral window sinus elevation procedure — supplied in a single organised tray (Catalog No. SLAKIT).
| Component | Function | Key Spec |
|---|---|---|
| LS-Reamer LS520 / LS620 / LS720 LS535 / LS635 / LS735 |
Main instrument — creates lateral hole in sinus wall. Tapered trunk controls drilling depth without stopper; bone chip fill protects membrane from tearing. Sharp center point prevents slipping for upright approach. | Ø5.5 / Ø6.5 / Ø7.5 · Length 2.0mm or 3.5mm 2,000–5,000 rpm |
| C-Reamer LC520 / LC620 / LC720 LC535 / LC635 / LC735 |
Alternative reamer that harvests a circular bone core disk from the lateral wall — preserved and used to cover the lateral window before suturing. Hollow-space tapered design controls depth without stopper. | Ø5.5 / Ø6.5 / Ø7.5 · Length 2.0mm or 3.5mm 2,000 rpm (recommended) |
| C-Guide SCG510 / SCG610 / SCG710 |
Guide drill to establish precise position before using C-Reamer on the lateral wall. | Ø5.5 / Ø6.5 / Ø7.5 · Length 1.0mm |
| Sinus Membrane Elevator #1 SLE05 |
Initial membrane elevation — designed for mesial and distal detachment after the lateral hole is made. | Used first in the elevator sequence |
| Sinus Membrane Elevator #2 SLE02 |
Dual-function elevator: L-shaped end detaches membrane from the lower lateral wall; reverse end elevates membrane from sinus floor, medial wall, and posterior wall. | Used second in the elevator sequence |
| Sinus Membrane Elevator #3 SLE03 |
Designed to detach membrane from remaining deep sites in the sinus — anterior and posterior areas beyond the reach of Elevators #1 and #2. | Used third in the elevator sequence |
LS-Reamer vs C-Reamer: Use LS-Reamer when artery bleeding risk, septum existence, or overlapping inferior cortical wall and cancellous bone layers are present — the lateral hole can be inspected through the drilling opening. Use C-Reamer when preserving the bone core disk for window coverage is preferred. Both reamers operate without a drill stop; depth is controlled by the tapered trunk geometry (maximum 3.5mm).
Technical specifications
| Device type | Sinus Lateral Approach Kit — lateral window sinus elevation surgical instrument set |
| Material | Medical grade stainless steel (surgical tools and drivers) |
| LS-Reamer diameters | Ø5.5 · Ø6.5 · Ø7.5 |
| LS-Reamer lengths | 2.0mm (LS520 / LS620 / LS720) · 3.5mm (LS535 / LS635 / LS735) |
| C-Reamer diameters | Ø5.5 · Ø6.5 · Ø7.5 |
| C-Reamer lengths | 2.0mm (LC520 / LC620 / LC720) · 3.5mm (LC535 / LC635 / LC735) |
| C-Guide lengths | 1.0mm (SCG510 / SCG610 / SCG710) |
| Maximum drilling depth | 3.5mm — controlled by tapered trunk geometry, no drill stop required |
| Operating speed (1:1 contra) | Up to 5,000 rpm (initial positioning) · 2,000 rpm (drilling) |
| Operating speed (1:20 contra) | 2,000 rpm |
| Membrane elevators | #1 SLE05 · #2 SLE02 · #3 SLE03 — used in sequence for systematic elevation |
| Sterilisation | Steam autoclave — Pre-vacuum: 132°C / 2 bar / 3 min / 30 min dry · Gravity: 121°C / 1 bar / 40 min / 30 min dry |
| Sterility | Non-sterile medical device — must be sterilised before and after each procedure |
| Manufacturer | Neobiotech Co., Ltd — Seoul, Korea |
| Origin | Made in Korea |
Getting the most from the SLA Kit
Practical guidance for safe, controlled lateral window sinus elevation with the SLA Kit.